Koha Patron Card Creator– With Graphics Design

May - 02
2021

Koha Patron Card Creator– With Graphics Design

Pic-1

Koha LMS has an easy patron card creation module with minimal data fields. The majority of the libraries don’t utilize this feature for many reasons. With and without a small code change in Koha, patron cards can create more attractive with some graphics in them.  The majority of our clients now printing single patron card as a common ID card for their college/Institution and library. Here we look at how we can add some graphics to the Koha Patron card.

ID card Size

The common use ID card is CR 80 (54 mm * 86mm), which is the same as bank ATM, PAN Card, Voters ID, etc. We are using the same one.

Graphics in Patron Card

The idea of graphics features adding to Koha depends on the images that we adding in layout, where we need to design the image in a tricky method by some image manipulation software. By default Koha support only two images in the patron card layout. But one must be the patron image. So we have only one image to graphic design our card. We adding the feature in the Koha layout to add more images by changing the default code in the patron card creation module. The parameter that we are used is shown at the end of this blog, this may vary with depends on the image and data of yours.

PIC-2

Without code change

If you are ok with one image, the ID card looks like as below, we need to design only one image and put the parameter value correctly in the layout.

PIC-3

With Coding

‘More images more graphics’.

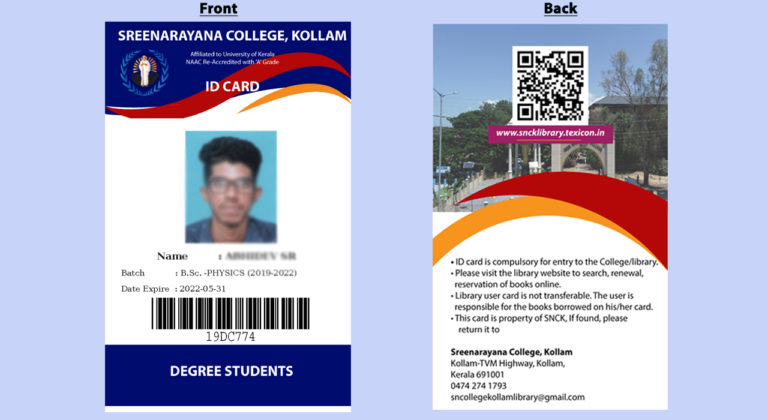
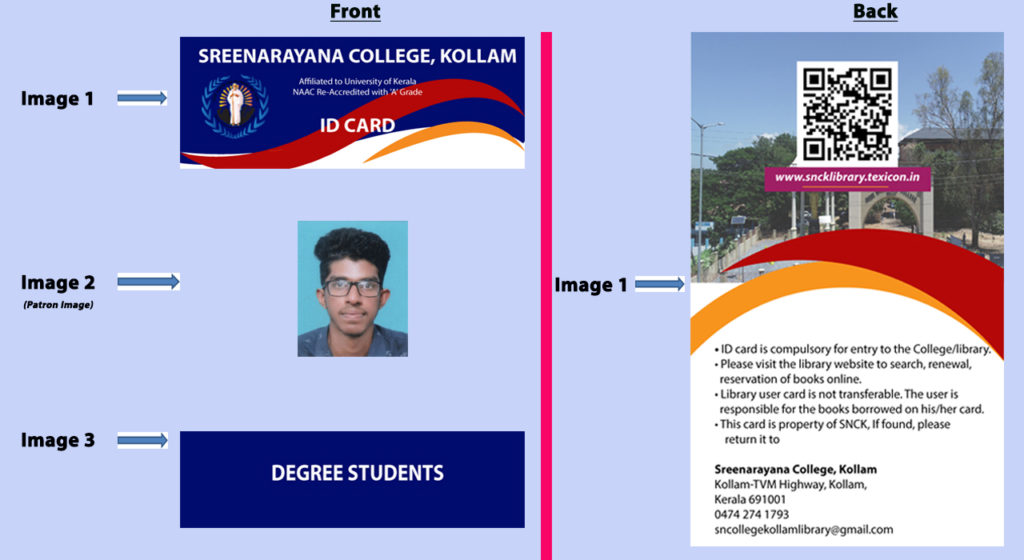
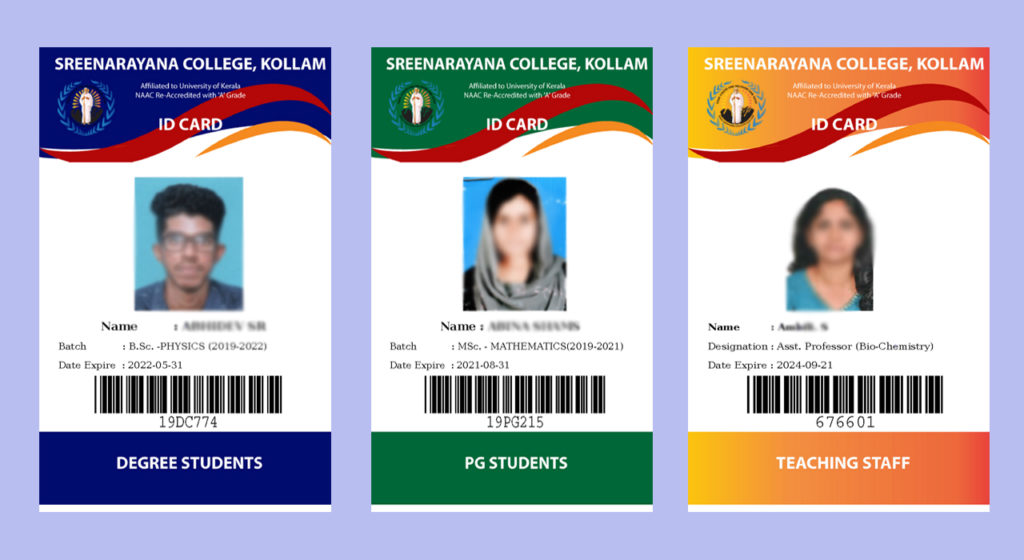
By changing some Perl and concert script in Koha we can add more images to the layout. Here we are adding one more image to Koha’s layout. Thus it becomes 3 images including the patron image and its looks like in the PIC-1 shown above.


Code Changes

Before making the following change you must take backup of the following code original file for safety and also for any error in the future update. We tried this in ver20.05

  1. We need to replace the default edit-layout.pl from /usr/share/koha/intranet/cgi-bin/patroncards   with the updated one which you can download from here.

  2. Similarly replace the default edit-layout.tt from /usr/share/koha/intranet/htdocs/intranet-tmpl/prog/en/modules/patroncards  with the updated one which is included in the above downloaded file.

  3. Run the following command after replace the files.

sudo chmod a+x /usr/share/koha/intranet/cgi-bin/patroncards/edit-layout.pl

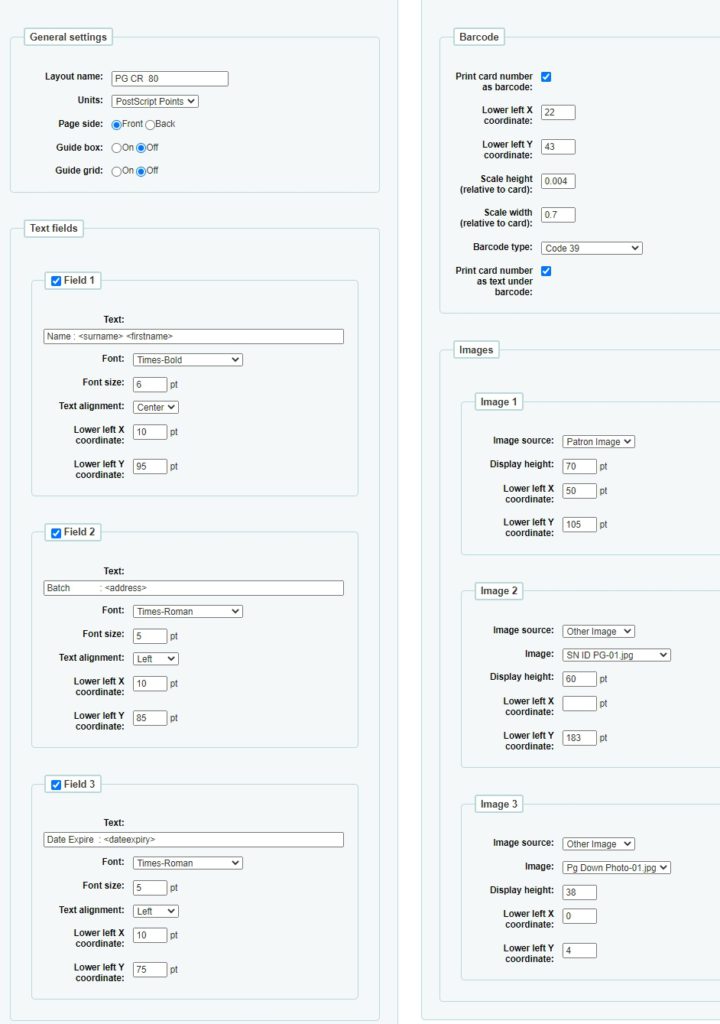
After these action the layout option will show that we can add 3 images data when you create a new layout. With this benefit, we design the 3 images in our patron card.

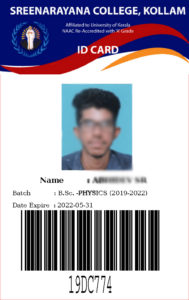
By default Koha barcode in the patron card occupies by 20% the height of the card and 90% of the width of the card. This will result in a big barcode in our CR 80 design as shown in the PIC-3. So for decreasing the size we change the barcode parameter scale height and Scale width.

Same like this we can design a back page of ID card with the single static data image as shown on the PIC-1‘s right side or you can repeat the same step like the front page for the back page with multiple images by creating a different layout for the front page and back page.

Different graphic cards to different Patron categories.

PIC-4

We can set different graphic colors or designs to different patron categories by designing the different layouts with different images. But Koha by default only accepts 5 images in patron card creation. To change that we need to change the setting in Global System preference – Tools – Patron card -Imagelimit to 10 (Or How many you needed). The layout and card template parameters that used are shown below.

PIC-5 Layout, Parameter
PIC-6 card, Template Parameter

Leave a Reply

Your email address will not be published. Required fields are marked *

Open chat
Powered by
Close Bitnami banner